
There are many detailed parts to a good dust collector system. Since some of the steps to putting together a complete system can get quite involved, I have explained some of them separately. See “2 H.P. CYCLONE DUST SEPARATOR” and “BLAST GATES” and “MANOMETER”

After making the cyclone dust separator, assemble the finished cyclone to the blower / filter assembly. This requires a few modifications on the factory ductwork.


Make sure you support the filter mounting ring very securely because there is a lot of pressure put on it when installing and removing the filter. I supported mine at three points.

The dust collection barrel sits on a platform that can be lifted by stepping on a hinged lever. Then spin two ¼” wing nuts to hold the barrel up tight to the cyclone.

Overflowing the barrel causes the dust to flow into the filter and plastic bag. After doing this several times, I finally installed a sight hole in the barrel, so I could see when it was getting full.

I installed my complete collector in a closet I built, lined with carpet to absorb the sound.

If you do this, note that you will have to include a way for the air to escape the closet, when the blower is running.


You will notice I added a manometer to my system, to alert me if the filter is getting plugged.

For convenience, I installed a contactor for the blower and wired in pushbuttons at different locations for starting and stopping.

For wall supports I cut half circles in a 1×4 and just used one screw in the middle to mount it to the wall.


To make your own 4” pipe straps, cut a section of the 4” pipe ¾” wide. Remove a couple of inches of the ring. Then heat up the remaining ring with the heat gun, and bend it to shape on a form you can make for these 2-hole straps. When screwing the straps to the wood cradle, be sure to drill a small pilot hole and use a small, long screw. Otherwise you will most likely split the wood. I used some #6 x 1” long screws.


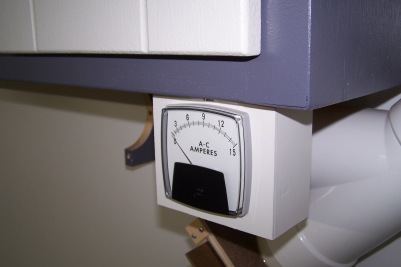
I even went a little crazy and added an ammeter so I could monitor the 2 hp blower motor.
I made new dust collector boxes for the miter saw and the radial arm saw. The miter saw can slide in or out, depending on which saw I use. The nice thing about not just using a shop vac anymore, is that I can have dust collection on both the top and bottom of all my saws and router now.


It is so nice to have the system complete now. It saves a lot of time by not having to roll the shop vac. around to each piece of equipment.


